Showing posts with label embedded. Show all posts

Wednesday, May 14, 2008

DIY EL BackLit Photo Frame.


Electroluminescent(EL) technology always uses in the backlit of small LCD. From wikipedia:

Electroluminescence is the result of radiative recombination of electrons and holes in a material (usually a semiconductor). The excited electrons release their energy as photons - light


Anyway, it is good for lighting.

I got the EL panel in a local store which should be powder phosphor-based electroluminescent panel. It is a 3.5" x 4.6" white light panel.


It included an adapter for converting 12VDC to AC for the EL panel.

Let's see how we can make use of this EL lamp.


1. Use for slice viewing


2. Put a Post-It on it, and you can see a growing Post-It in the dark.


3. For home lighting, illuminate your Toys.

4. A BackLit Photo Frame

Step 1 -
To make a DIY backLit photo frame, you can get a large photo frame in store or you can make one yourself. Here we are:


Step 2 -
Glue the panel in the back cover of the photo frame. You can see there is about 1.5 inch space between the photo glass panel and the back cover. We like to have some distances apart the EL panel and the glass to diffuse the strong illumination of the EL.


Step 3 -
Power Up.


It looks alot better on my desk, sorry for my poor photo skill. Let's see the photo frame in action in the below youtube video. Enjoy It.

Anyone who want to get this EL panel (3.5" x 4.6"), We can order it for you. It is only US$15, and $5 for shipping to US and Canada. For payment, We use paypal. Please contact us: order@bitartist.org

Sunday, March 2, 2008

Small 5x7 Dot Matrix LED display

What is 5x7 dot matrix display?


5x7 dot matrix Led display is usually used to cascade together to make a large led matrix display as you see in train station.


(A typical LED matrix display)

The small size of 5x7 dot matrix led display is good for small electronic project, typically the 5x7 dot matrix is used to display one character a time, i.e. 5x7 dot matrix font. In order to use only one 5x7 dot matrix to display information, we have to use the 5x7 dot matrix horizontally. We use the 5x4 dot matrix font instead and of course text scrolling will be necessary.

The KAAS Led flower vase is using the 5x7 dot matrix display for displaying messages.

kaas used one AVR tiny13 and two 74hc595 chips to drive the led matrix, the result is very impressive. The detail information of the LED flower vase is here.

Another interesting project is the Twitter LED scroller Build from davidnin. He used the Arduino board and one 74HC595 to drive the 5x7 dot matrix led. Please check out the cool video:

Another project from us, GIF2LED!
it allows you to convert a gif animation to LED header file to speed up your coding time:)

Check it out:
http://www.bitartist.org/2008/06/gif2led-released-and-with-my-led-egg.html


Another cool tiny message scroller using ATtiny2313 from kalanda:

http://www.kalanda.com/scroller-de-7x5-leds-basado-en-micro-attiny2313.html


Sunday, February 24, 2008

Solar Power, the green power source.

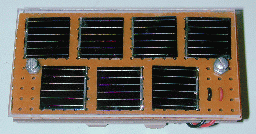
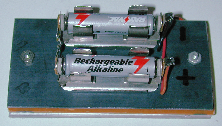
Solar Power Charger

Solar power is not a news nowadays. People are finding better ways to get power without harming the earth. To use of solar power, you need the solar panel that converts solar energy to electricity. So how to make a small solar charger for your home use? This solorb's website teaches you how to make a simple AA battery solar charger, few components are needed, a nice choice for your home project.


The project needs few solar cells, and 1 1N5818 Schottky Diode and of course the AA rechargeable battery. Why Schottky diode? this diode have less voltage drop when current flow through, it is important as we want to be sure the energy is not wasted on the diode which is only used for preventing the current through back to damage the solar panel when the charger leave in the darkness. You can also buy the solar kits from the author website as well.

Take it into real life application, you may add the solar charger to your radio! Let's read the tutorial bought you by gotwind.org "DIY Solar Powered radio for $5", the theory is the same as the AA charger.


Another video showing a home-made solar USB power charger:

Solar Powered USB Charger - Cheap And Easy To Make! - The most popular videos are a click away


A very comprehensive study on Solar power charger: REUK.co.uk - Solar Battery Charging.

Thursday, February 21, 2008

Red Led Bubble From the 70s.


I found this special Red led bubble in ebay by (powerandlight).
It looks so cool to me. I didn't see this led before, I found out that it should be similar to one used in TI-59 or other old calculators in the year 1977. It was not in production anyway.
Each bubble can display A-Z and 0-9. It should be the same as 15 segment LEDs nowadays. I hope it can be larger otherwise it is so small to use as a cool display.

Jeroen used the AVR ATtiny2313 with 74HC595 to drive this cool red bubble, as he called "Starburst Led" project:

Robot idea from natural creatures.

It is one of my favorite video from http://www.newscientist.com/, it talks about the robot research around the world that using the movement technique from different kinds of animal. It is really amazing to see all these robots moving. It is really Real.


Wednesday, February 20, 2008

The wireless rabbit: Nabaztag

What is Nabaztag?

The cute wifi rabbit is another internet widget device, it connects to the community server online and user with the rabbit can use it as a medium to communicate. Sounds funny when you have a group of friends with the rabbit at home. The wireless rabbit can move its cute ear and also light up the RGB leds inside to express the feeling and mood. It is capable of using as Alarm clock, weather reporter and RSS feed readers.

The Internal

What surprise me is the hardware inside. The rabbit is using a PIC18F6525 MCU and a PCMCIA BenQ 802.11b wifi card. It is not so strong as I guess. The network software stack is done on the PIC including the TCP/IP stack and the 802.11 stack. It is hard to imagine to get all these stacks on a PIC, so they did it. One similar cool project I found is the WLAN for AVR project, I will consider to use uClinux if the cost is not really an issue:)

Some internal photos by Pokie


External Links

Official Site: http://www.nabaztag.com/
Community Site: http://my.nabaztag.com/
Rabbit tear down photo: http://pokie.dyndns.org/photos.php?album=nabaztag&page=1

Chumby now avaliable.


Chumby is a real-life widget device as I call. It has a 3.5" LCD touch screen, speaker, microphone, 2 USB 2.0 ports and also the wireless 802.11bg adapter inside. Basically it is a device that capable of running widget making by Adobe Flash and fetching information from the WWW via wireless connection.

You can use it as normal alarm clock, playing mp3s, displaying photos from flickr, youtube, weather report and also some other cool stuffs that made by developers all over the world. It is a open hardware/software product, developers are welcome to make their applications inside the Chumby, they can make Flash Widget and also hack the Linux kernel as you wish.

The USB ports allow you to connect your iPod and also USB disks, and USB to Ethernet adapter also. It is excited to see how other developers making of this open platform to make something cool. It was announced in late 2006 and only become available to public in Feb 2008. Many people are waited so long for the cool chumby. So now, order it @ http://store.chumby.com/, it costs US$179.9.


The Chumby industries: http://www.chumby.com/

The Widget: http://www.chumby.com/guide

The Development wiki: http://wiki.chumby.com/

Monday, February 18, 2008

Information on Integrated Circuit/IC Packaging.


Integrated circuit is the key component of every electronic project, it can be simple as logic gates, counter, multiplexer to highly complex microprocessor. When you buy IC online for your project, the same IC may have different packages, you have to choose the right package type for your prototype. For example, DIP, PLCC, BGA etc. This website (Integrated Circuit, IC Package Type) gives you a list of common package type definitions, you can get more information there. For me, I usually make my project on the wooden prototype board, so surface mount package type is not prefer unless I make the PCB myself. I usually used the DIP package for the microprocessor(MCU) and also the other IC, like 74HC595 and 555 Timer. It is easy for soldering and also wire wrapping.


#1 - Transistor with TO-92 package


#2 - MCU(AVR tiny13, DIP package) contains in a plastic tube.


#3 - 74HC595 IC in DIP package plugged into the wooden prototype board.

If you really want to find in depth information of the IC packaging type, please visit this website: Discrete Packaging (Fairchild Semi)

Information on connectors, sockets, headers.

There are different kinds of connector, socket and header used in electronic projects. The folks in scienceproj.com sorted out some of the common parts and describe in details.


Read More <Link>